Step-by-Step Guide to Connecting Your Stripe Account with Phair
Phair Team | Jan 21, 2024 | 5 min read

Hello, Phair Sellers!
Ready to start earning through your Phair shop? One crucial step is setting up your Stripe account for seamless transactions. Don't worry, it's a straightforward process, and I'm here to guide you through it, step by step. Let's get your earnings flowing!
Getting Started with Stripe on Phair
1. Navigate to Stripe Setup
Once your shop on Phair is up and running (check here for how to open a shop), head over to your dashboard. Click on "Payments" in the left menu. Here, you'll find the option to begin the Stripe onboarding process. Make sure to have your personal details, business information, and bank info handy for the setup.

2. Opening a Stripe Account
Click on "Setup Payouts on Stripe". A new browser tab will open. Enter the email you wish to use for your Stripe account and click 'continue'.

3. Secure Your Account
Log in to your account. Or create a password for your Stripe account and verify it with the 6-digit code sent to your phone.

4. Business Information
Next up, fill in the basic details about your business – location and business type. This info helps Stripe understand more about your venture.

5. Personal Details
Now, enter your personal information. Stripe needs this to verify your identity and ensure everything is above board.

6. More About Your Business
Provide further details about your business. This includes your industry, website, and a description of what you sell. To link your Phair storefront, just grab the URL from "My Storefront" in your dashboard and paste it here.

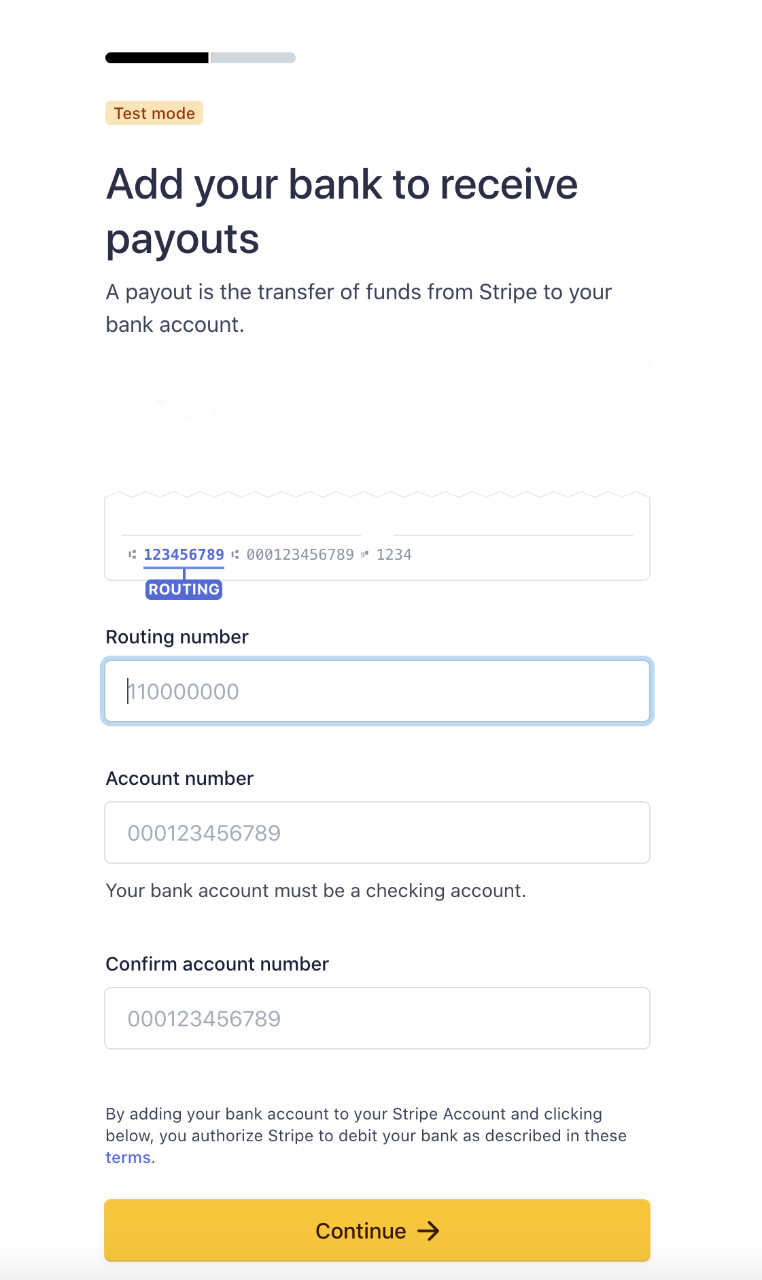
7. Bank Account Info
Here's an important part - enter your bank details. This is where your earnings from Phair sales will be deposited.
8. Review and Submit
Finally, review all the information you've entered. Once you're sure everything's correct, confirm and submit.
Pausing and Resuming the Onboarding Process
- Pause Anytime: If you need to stop the process for any reason, simply hit "Return to Phair" or close the tab. Your progress is saved automatically.
- Resuming Setup: To continue where you left off, go to your dashboard, click on payments, and select "Setup Payouts on Stripe".
Finalizing Your Stripe Connection
- Verify Your Email: After completing the onboarding process, don't forget to verify your email address. Check your inbox for a verification email from Stripe and click the "verify email address" button. Your account isn't fully connected until this step is done.
Congratulations!
And that's it! You're all set up to receive payouts via Stripe when someone purchases your product on Phair. It's smooth sailing from here on out.
Happy selling, and here's to your success on Phair!